|
|
|
I have been asked a number of times how to narrow
a front beam. In stead of sending out a step by step set of instructions
I thought I would put them up here for anyone to see how I did it.
I have been told about a couple other ways to do it, but this has worked
the best for me. Please let me know what you think, or any comments
you may have. The process is not overly difficult, but needs to be
done correct for safety reasons.
Before the beam can be narrowed
it needs to be removed from the car and cleaned very well. I used
a can of engine cleaner and a wire brush. I am not going to go into
removing the beam from the car......that is the easy part!!
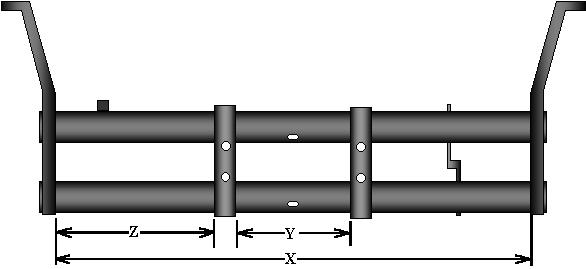
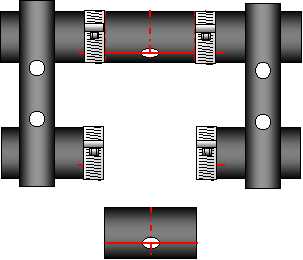
Step 1. Before making any cuts measure and write down the distance
from the shock tower to the frame mount(Z), the distance between the mounts(Y),
and then the over all length of the beam(X).
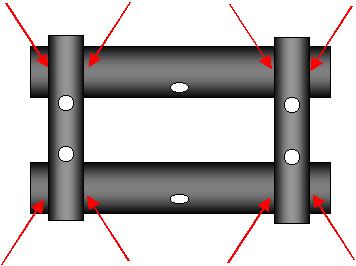
Step 2. Using a hand grinder take the welds that
hold the frame supports most of the way back, but leave them attached.
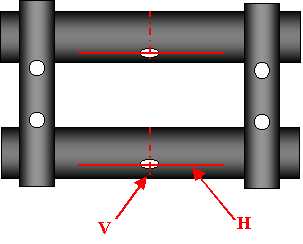
Step 3. After the beam has been cleaned and fully disassembled,
scribe a line horizontally and vertically to mark where the center
of torsion hold bolts were. Make sure the horizontal line is about 3 inches
out from the center. This line will be needed once the center has
been cut out.
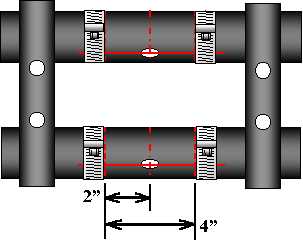
Step 4. Place a hose clamp on both sides of the center mark and
move the clamps out 2 inches each from the center and tighten them down.
To make sure they are parallel I like to use a piece of hard cardboard
cut to 4 inches with a center mark on it. It is not a bad idea to scribe
these marks in case the clamp slips, or you need to remove them.
The reason 4 inches is being taken is that I like to weld in a 2 inch wide
Sway-A-Way torsion adjuster. Part of the reason for narrowing is
also to go lower right?
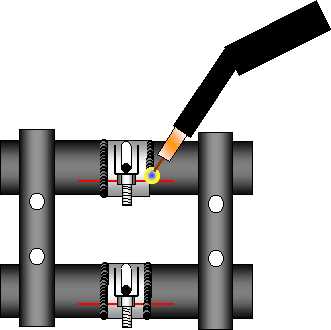
Step 5. Now the fun part!! Cutting !! The first beam I did I
used a hack saw. It worked well to get a nice clean cut, but takes
a long time, and a near broken finger (will not go there). Other
beams I have used a Saws All. This is a clean cut as well, and if
it is a little off you can always grind back to the clap scribed line.
Both the top and bottom tubes need to be cut at this time.
Step 6. Take the center piece that was just cut out and use it
to set up the angle that the torsion adjuster will be placed into the beam.
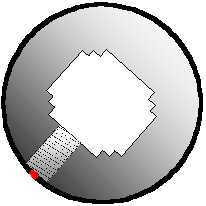
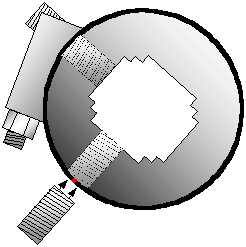
The Sway-a-Way adjusters as well as other brands I have seen have two places
for set screws. One is to hold the torsion bars and the other is
to turn the adjuster. If you want to be able to keep the stock highth
and lower mark the torsion adjuster as above in red. When I did the
one on the Ghia I turned the red mark up about 3/16" (clockwise above"
this let me raise the front about an inch and take it down about three
inches.
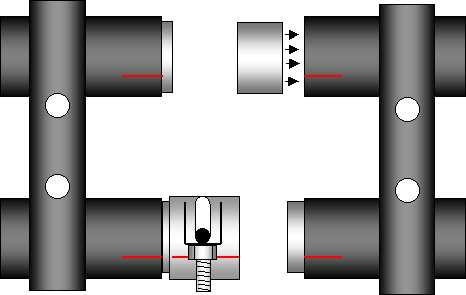
Step 7. To help hold everything strait I used four
2 inch piece of pipe that slid snug into the beam, one on each side of
the adjusters. Then I found a couple pieces of angel iron and hose
clamped the upper and lower tubes to it after putting it all together.
Use a strait edge and make sure everything is all in-line and tack weld
the adjusters in. Let them cool and then check everything is still
strait.
Step 8. When doing the final welds I found it best to just do an inch at a time and then move to another side. I had one warp and made it hard to turn the torsion adjuster.